

Our website is supported by our users and contains affiliate links. We get paid when you purchase or sign up for anything through those links. Read the full disclaimer for more information.
Last Updated on October 27, 2020 by Yovana
If you are a newbie or established blogger, chances are you have heard of rich pins and how they can benefit your blog or business. I am sure time and time again you have been confused about how to apply for and use rich pins. I have seen so many blog posts on how to apply for and use rich pins but none that show you easy to follow directions to do so.
Which prompted the creation of this post which shows you step by step how to set up rich pins and start getting more traffic from Pinterest to your blog.
As a blogger, Rich Pins are important for your blog or business because they provide more information about your posts that the pins are linked to. Each Rich Pin for a blog post is categorized as an Article Pin and shows the headline, author, and story description. Rich Pins provide more context about your Pin by showing extra details directly on your pin. There are four types of Rich Pins: App Pins, Product Pins, Recipe Pins, and Article Pins. All these types of Rich Pins help pinners save the stories that matter to them. People are more likely to save a Rich Pin than a plain old regular one.
The more times your pins are repinned, the more likely they are to be seen. The more likely they are to be seen, the more likely they are to be clicked through to your site and repinned again. And you know what that means!? The potential to go viral!
If you have not yet started a blog and want to, or are having trouble with where to start, check out How To Create A Self Hosted WordPress Blog. If you sign up for Bluehost with my link you get a free domain, free site builders, free 1-click WordPress install, 24/7 support and all for only $2.95 a month! You really can’t beat that deal. I have already made $3000 from affiliate marketing alone after only 6 months of blogging, thanks to the Making Sense Of Affiliate Marketing course.
Table of Contents
Ready to apply for and use Rich Pins today?
Let’s get to it then. Once your pins to your posts exist on Pinterest, they always exist on Pinterest. They will just continue to be pinned and repinned back and forth, bringing you traffic while you sleep and passive income if you utilize affiliate links within your pins and posts.
First, Install the Yoast SEO plugin.
Go to the plugins page of your WordPress dashboard and type in Yoast SEO. Click the Yoast SEO plugin to download, install, and activate the plugin.
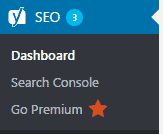
After YoastSEO is activated, navigate to the plugin on the left sidebar of your dashboard.
Click where you see ‘SEO’.
On the Yoast SEO plugin page, select the tab that says ‘Features’.

On the ‘Features’ tab, scroll down to where you see ‘Advanced settings pages’ and click to enable. This will enable metadata on your site’s or blog’s pages.

Once you have metadata enabled on your pages, you are ready to validate your pins!
Second, Validate your Pin.
Head over to the Rich Pin Validator and enter the URL from one of your recent posts. Do not use your site’s home page URL. For example, I used this post’s URL for my Rich Pin validation and application. Copy and paste your chosen URL into the Rich Pin Validator and click ‘Validate’.

Third, Apply for Rich Pins!
After you click ‘Validate’, you should see a message that says “your pin’s been validated!” Then, click ‘Apply Now’ and select ‘HTML tags’.
That’s it. It may take up to 1 hour for your Rich Pins to take effect. However, for me, it was pretty instant. After your site and Pins are approved, all your Pins (past, present, and future) will show up with a headline (post title), author (your Pinterest username and site) and story description.
After your site and Pins are approved, all your Pins (the past, present, and future) will show up with a headline (post title), author (your Pinterest username and site) and story description (the meta description you have filled out in Yoast SEO).
Make your pins go viral!
No one is going to click on a Pin that they don’t find interesting. Design your Pins nicely, make them easy to read, hook the reader with exciting text and images, and make them vertical. You can do all of this with PicMonkey.
To get interesting images for your pins, get 10 free images from Adobe Stock or check out this post where I list tons of resources for free stock photos!
In PicMonkey, you can use any one of their hundreds of Pinterest vertical image templates to customize to your desire. I usually make 1-3 Pins for each post and pin them at the highest performing times. For Pinterest that is between 8-11pm. Take that mental note of the timing, that is the most important part. During that time is when the post people are on Pinterest and actively engaged. This means they will be more likely to see your Pin, repin your Pin and click through to your website.
Another surefire way that your Pins will go viral is to take a stab at using Tailwind to schedule your Pins and join Tailwind tribes. This will boost your chances of your Pins going viral and skyrocket your traffic!
Get PicMonkey and Tailwind free today to try out for a trial period. For PicMonkey, click here. For Tailwind, click here and get a free $30 to apply to any future paid trial of Tailwind.
Get the full scoop on how to go viral in this loaded post that tells you step-by-step how I went from 300 to 3,000 views in 1 day!
Beware, you will get instantly hooked.
What other strategies have you implemented with Pinterest to make your Pins go viral? I would love to hear about it in the comments!
Related:
How To Boost Your Traffic With Pinterest
How To Create A Self Hosted WordPress Blog
How To Create Stunning Images For Your Blog In 5 Minutes
The Top 11 Resources For Free Stock Photos
How To Create A Beautiful Blog Using Free WordPress Themes
Boost Your Blog’s Traffic With WordPress Plugins
How To Grow Your Email Subscriber List By 100%
Here are some free blogging resources that have helped me on my blogging journey. Maybe they can help you too?
The Ultimate Blogger Freebie Master List
Sign up to get this master list of the top freebies for bloggers; free stock photos, checklists, courses, guides, planners, etc.
Blogging resources that I love:
Here are some blogging resources I use to get from where I was when I started in April 2017, to now.
Bluehost: When you are first starting your blog, you don’t want to spend a fortune on hosting and neither did I. Hosting your blog on Bluehost gives you a free domain, free site builders, free 1-click WordPress install, 24/7 support and all for only $2.95 a month.
Making Sense Of Affiliate Marketing Course: When I first started this blog I was confused with how people made money on their blogs, scratching my head wondering why money wasn’t piling into my Amazon affiliate account. Then I found this course that is helping me to make almost $1000 a month, and my blog isn’t even a year old. If you invest in any courses for your blog, this is the one to invest in!
Creative Market: I love using Creative Market to find cute graphics, stock photos, fonts, plugins and themes to incorporate into my blog. I also love the periodic freebies they send straight to my inbox. There is something for everyone on Creative Market, for as low as $0 in some cases!
Elegant Themes: Elegant themes is the number one theme provider in premium WordPress themes, in my opinion. Their Divi theme is out of this world and completely changes the way we build and maintain blogs by making everything 100% easier. I love this site.
Affiliate Window: A number of the affiliates I promote throughout my blog come through Affiliate Window or AWIN. Affiliate Window is a great and easy to use affiliate network to help boost your blog earnings.
Grammarly: Without this tool, every other sentence you read on this blog would be completely butchered. Grammarly is an extension I installed onto my Chrome browser and automatically spell-checks and grammar-checks ANYTHING I type. I love it.
Picmonkey: I use PicMonkey and Canva for editing all the images, graphics, pinnable images and featured images on my blog. I switch between the two to keep the cost low ;).

Daniella is the creator and author of iliketodabble.com. When their wife Alexandra and them aren’t globetrotting or playing with their 7+ animals, they are dabbling and working towards a future of financial freedom.
Pingback: My Top 10 Performing Pins In 2017 and Some Reasons Why * Shannon's Grotto
This is the MOST helpful article I’ve found for the whole rich pin process on Pinterest. One question… Do I need to validate all of the blog URLs that I would like to have considered a rich pin? Or will that happen automatically after the first article has been approved?
Thank you for your help!
You only need 1 url that is not your main home page url and boom — all your pins are validated!
Great tips!